About Face Time

Graceful negotiation for the signs of aging

DIY OH Baby! Natural baby wipes for great baby skin

babies

Baby B, little Lorin & Sarah and soon after we rocked Lorin’s world by bringing home her little brother.

Today, I am posting this DIY baby wipe post in honor of three of my favorite girls (Casey, Jenni and I can’t name the third because it’s still a secret. shhhh) who are having babies late in 2015, or very early 2016!  It feels like it’s been such a long time since mine were babies, and the fact that there will be babies that I will totally be able to get my hands on to squish and love on is just plain exciting!

Did you know that commercially made baby wipes contain ingredients that carry hazard ratings? if you are really curious, head on over to the Cosmetics Database and check out their complete list of different brands of baby wipes and the hazard rating. It still makes me slightly crazy that it’s “allowable”, and yes – I am aware that many babies handle the use of these wipes “just fine”. Although, I have met many infants with chronic runny noses, colic and more – with an unknown etiology – and I have to wonder – if their toxic load was lightened- would their little systems do better? I think we all have been guilty of thinking that a product is fine – if there is no rash, or no visible sign of a problem. Now that we are reading more and more information about the gut being our second brain and the center of most disease, perhaps we’ll see some improvement in what is allowed in commercially sold products.  Click here to go to the database. Once you get there, click the little arrow to the right of the word “Score” to list them in reverse order. This means the wipes with the most hazardous ingredients will be listed first.

Before we get to the recipe – I’d like to point out that manufacturers are also picking up on the natural world’s “key words” – therefore words like “goat’s milk’, “green tea”  and “Chamomile” are in the names of the wipes. If a product name contains these words, they have to be good right? Wrong. Those three ingredients are in the names of the top 3 worst brands on the market today. These wipes have a hazard rating of 7 and ingredients found in these wipes have been linked to allergies, high toxic loads, developmental delays, organ dysfunction, endocrine disruption – and cancer.  Read your labels – and better yet, make your baby wipes at home. Save some money, remove all doubt.

When I started my journey for healthier living, I was sort-of forced into it. I had rapidly declining health – at the old age of 26. Modern medicine just wasn’t working and I didn’t have time to waste with a newborn on my hands. As I looked around for healthier alternatives, I found some – but man, were they expensive! So, I searched blogsites and other resources to find that many of the recipes that existed suggested the use of baby oil (or mineral oil) and baby lotion. Eeek! If you want to be frightened – check out those ingredients on the database linked above.

You can imagine how the rest of the story goes – trial and error – mostly error. Finally, I had the ingredients down in a way that would allow the wipes to work -with no skin irritation!  It is simply a bonus that if you purchase the needed items in bulk, I estimate that you can save approximately $135 per year per kid with DIY wipes. Who wouldn’t cheer for healthier and less expensive? If you are just starting out your family, gather a group of Mom’s and Dad’s and co-op the batches together.

Let’s gather a list of what you need.

1. 1 roll of heavy duty paper towels. I use Bounty for making baby wipes. Recall my trial and error? Cheaper paper towels just do not work.

2. 1.5 cups of boiled distilled water. (Allow to cool, but you’ll want to use it still warm – not room temperature). Note: you can use regular water as well, if you use wipes quickly and will use in under a week or so. If you are doing a larger batch, use distilled water – so they will last longer).

3. 1 tablespoon of pure witch hazel extract. To purchase the one I use, click here

4. 1 tablespoon of pure aloe vera gel. Which I purchase, here

5. 1 tablespoon of liquid Castile Soap. I use Dr, Bronner’s Organic Pure Castile Liquid Soap, Baby mild. Click here.

6. 1 teaspoon of Grapeseed oil. I use Epicurean Olive Oil’s brand (click here), which is available at Epicurean Olive Oil Company, located at The Avenue, 2615 Medical Center Parkway #2070 in Murfreesboro, TN 37129. Their 12.7 fl oz bottle is regularly priced at $16.95. (You can save 10% by bringing your clean empty bottle back into the store). About Face also carries a sampler size of Epicurean’s Grape Seed Oil, 2 ounces, for $6.00.

7. 1/4 teaspoon vitamin e. I use JASON vitamin E, 5,000 IU – available here.

8. Essential Oils of your own choice. I use 5 drops of two oils per batch as described above. I commonly use 5 drops of Lavender and then either 5 drops of Melaleuca (tea tree) or 5 drops of wild orange. You can get your essential oils here, or by contacting me directly, mentioning this blog post and saving 15%.

31bFOazh8bL

Grab a container…

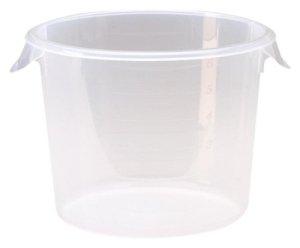
Okay, now that you have all of your ingredients, you’ll need a container to store them in. You can ask a friend to save you one of their discarded old baby wipe containers, or you can locate a BPA free rubbermaid container that is approximately the same size as a roll of paper towels cut in half. Typically, you’ll be looking for a container that will hold approximately 10 cups. The Rubbermaid #6 container works the best.  This is the one I used. (Click here). Here’s the lid for that container. (Click here). If you want your wipes to be able to be pulled out through the top, the container has to be round and tall enough. Simply look for BPA free and select the right size. Cut a criss-crossed slit in the lid and you are all set.

Cutting the roll of Bounty paper towels…

Back to trial and error….without removing the paper towel wrapper, use your electric knife to cut the paper towel roll in half – into two shorter rolls. An electric knife is the gadget that you may have gotten two of at your wedding, but rarely use. Yes, it will work to use a regular knife, but it must be sharp and you must be really patient. I can sometimes lack patience with things of this sort and I was seriously contemplating using my table saw (but couldn’t decide how to sanitize the blade) when I thought I should try my electric kitchen knife first! Viola. a clean cut – and everyone keeps their phalanges.  It may take up to two minutes to completely cut through the paper towel and the cardboard tube inside with your electric knife.

Making the wipe solution…

  1. In bowl mix the water, witch hazel, aioe vera gel, castile soap,Vitamin E and grapeseed oil and stir.
  2. Add essential oils if using, and mix again.
  3. Pour the mixture over the paper towel roll as it is standing up in your container and allow to absorb. This takes about 5 minutes or so.
  4. Put the lid on and flip the container over to make sure wipes get soaked through.
  5. At this point, (If you’re using the Rubbermaid container), pull the cardboard roll out from the inside. As you pull the cardboard roll out, the innermost wipe should start to come out too. This will start them for you. Pull the end of this through the slit you have made in the Rubbermaid lid.

A few notes about my trial and error. Until I knew what bounty paper towel I was using, I had to add a little more water to get the recipe above. Depending on what size roll and the strength of absorbency, you may find that you need more liquid to fully saturate your wipes. I typically pre-mix a few batches of the liquid and simply store it in a mason jar until needed.

container

If you are like me and are wayyyy past the baby wipe need stageyou could use this recipe and be the kindest baby shower guest you’ve ever seen! If no one you know, never has a baby again -you can also use a similar method to make DIY cleaning wipes.

Here’s how:

(Same container, same method – less ingredients!)

General Cleaning Recipe:

  • 1 1/2 cups white vinegar
  • 1 1/2 cups distilled water
  • 5 drops tea tree essential oil, 5 drops Lemon essential oil, or 5 drops OnGuard Essential oil. Click here to purchase EO’s, or contact me directly and receive 15% off by mentioning this blogpost.

Mix all ingredients and pour over a cut in half roll of bounty and use to clean any surface in your home!
Leave a comment »

DIY Powdered Laundry Detergent

Many of you have been asking for my DIY powder laundry detergent recipe. I’m finally sitting still for 5 minutes to blog it for you all. It’s actually a very simple process especially if you have someone explaining things to avoid. Of all the things I have done to make the transition to natural and clean living, making powder laundry detergent has been the simplest!

First things first – this is so much better for your skin than commercially made laundry soaps. If you or anyone in your family suffers from any skin condition – such as psoriasis, eczema or skin sensitivities that cause itching, hives or swelling – laundry detergent is a great place to start to reduce their toxic load. Second, it saves time and money! I have tracked the costs and with my calculations, I am saving almost 60% over store bought commercially made laundry detergent.

Here’s what you need:

1. Borax (I normally buy two of each thing when I stock up). Available at most grocery stores and Wal-mart.

borax-300x300

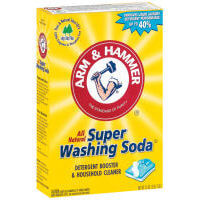
2. Arm & Hammer Super Washing Soda again, I buy two boxes.

3320003020

3. For each large batch you’ll need one regular size box of baking soda
arm-hammer-1-lb-baking-soda

4. 2 bars of EITHER Fels-naptha laundry bar soap or Dr. Bronner’s Pure Castille Soap. I prefer Dr, Bronner’s as the quality of this product is outstanding – and the come in different “flavors”. Typically I buy the lavender as pictured below.

104278dr bronner

How to:

1. First – take both bars of soap and either grate them (yes, using a cheese grater) or take it from me – purchase a small little Ninja food processor and cut the bar up into small pieces – grate it up, then grate it up some more.

2. Next measure in cups how much soap you have (do not crush it down, just take your grated bar soap and measure how many cups. The correct recipe is in a 1:2 ratio. Therefore – if you end up with 1 cup of grated soap, you will use 2 cups of washing soda and 2 cups of Borax. If you end up with 2 cups of grated soap, you will use 4 cups of washing soda and 4 cups of Borax. I always use just one box of baking soda.

3. Grab a large container to store it in. I bought a 5 gallon bucket from Lowe’s (it must have a cover). Toss all of the ingredients in the bucket and mix them up really well.

4. Once it is well mixed, take out enough of the mixture to fill your blender (or blender size Ninja food processor). Trust me – this will save you some clean up and some mixing. Drop 40 drops of the essential oil of your choice – I prefer Lemon, but we also use Lavender and Wild Orange at times). Blend the two items in your blender/Ninja.

5. Add this dry ingredient back into your large container/bucket and mix all together. Be sure to store with a cover!

Use 1/8 to 1/4 cup for each load – and yes! It’s High Efficiency safe!

*If you need Essential oils for this recipe, I do have them in stock. Lemon is $13. Mention this post and save 10%.  Let me know how it goes!

Leave a comment »

Father’s Day Flash Sale!

fathers dayTo take advantage of this Father’s Day Flash Sale – text 615.796.1915 or email thatwoodardgirl12@gmail.com.

Have a great day celebrating the super Dad’s in your life!

Leave a comment »

Derma what? Annual one day special!

Dermaplaning
header

If you’ve been through an elementary school level health class, you know that your skin’s job is to keep foreign substances out, your internal organs in – and to protect those vital organs from burn. The good news for us is that it does a fabulous job at keeping foreign substances out and that includes any pricey skincare product. Read that line again. Even a pricey skincare product. So what can help your skin better absorb any corrective product? Dermaplane.

First, let’s explore dermaplaning. If you’ve never experienced this service before, it is a very simple physical or mechanical method of exfoliation, which helps to remove dead skin cells and give your face a brighter complexion. I have seen it marketed for “hair removal”, and of coarse – it does remove vellus hairs [the baby-fine hairs on your face] as well as thicker hair, but it is not a permanent hair removal solution. It simply removes those baby-fine hairs because they are in my way! Although a perk, my goal is to provide a deep exfoliation sloughing off dead skin cells and old scarring. This will make your skin feel baby smooth.

Dermaplaning process (45 minutes):

1. The face will be thoroughly cleansed with a gentle cleanser, suitable for all skin types.

2. Any oil (even the good oils that your skin naturally possesses) will be gently wiped off using a sterile alcohol solution.

3. Your face will dry very quickly and the dermaplaning will begin. You will feel a slight scraping sensation, but the skin remains intact (and unbroken) throughout the procedure. If you have a rough patch on your skin, there is a chance of a slight nick [but much like shaving, these heal very quickly, most of the time before the end of the treatment]. Dermaplaning will normally take approximately 30 minutes for a full face and neck.

4. Immediately following dermaplaning a natural organic face mask with vitamin C will be applied to the skin. After approximately 10 mins, the mask is removed with warm towels.

5. A blend of organic oils with spf is then applied to the skin.

Second, let’s discuss absorption. Simply because you purchase a product that costs $60-$180 – does not make that product more easily absorbed by your skin. Remember, the skin is fearfully and wonderfully made to keep foreign substances out. Why would it just let that expensive product in? In short – it won’t. Dermaplaning sort of forces the skin to let it’s guard down a little in a controlled environment. I prefer to allow organic – easily recognizable by the body – products in. It is not different than transdermal medication, right? We’ve seen these medications come a long way since their inception. Now, there are pain medications, birth control and hormones delivered transdermally (through the skin). Often a small patch is placed and the drug is absorbed through the skin. It doesn’t just work on the spot the patch is placed, right? Right! It is absorbed systemically. Therefore, what we put on our skin matters. To recap – we know transdermal works – but for some reason we still aren’t looking at ingredients in these pricey skincare products. Would you eat plastic? Would you eat chemicals similar to those used to make asphalt and pavement? Go check out the ingredients in the items you are putting on your skin every day. Expensive does not mean better.

Tip: When applying any product to the skin, try to remember the temperature of your skin (roughly 98 degrees?). Now, think of the temperature of your skincare product. Most are stored in cool bathrooms, say – 70 degrees? Will a colder product have an easy time absorbing into the skin? Probably not. Since you can’t “heat” product up without destroying some of the useful stuff – make sure you are taking the few minutes it takes to “work” your product in. The heat caused by the slight friction and time alone on the skin will help warm the product u. (Mom’s will kids, I’m thinking of us here!) – We have a habit of throwing our own stuff on quickly to get everyone out the door. Take just a moment to work in your product. Otherwise, just squeeze it directly into the sink.

Although admittedly, I am not into pricey skincare products, I do have new clients every week who explain which product they bought over this or that high-priced-counter and I ask them to bring it with them. I will be glad to complete your full dermaplane service and apply my inexpensive organic product on one side of your face, and your product on the other side. We’ll compare immediate results with long-term results using the same method.

Here it is – the once a year special. If you are already a dermaplane fan, I challenge you to kick it up a notch and try it every two weeks over the summer! Lighter, brighter, flawless skin by Fall! If you are new to dermaplane – this price is guaranteed to be the best time to try it. This flash sale is for today only. You may purchase 3 for yourself and 1 as a gift.

Dermaplane treatment plus full aesthetic service. Today only – $35 each.

Regular price – $50 for dermaplane, or $70 for full aesthetic service hour with dermaplane as an add on.

To take advantage, email your request to thatwoodardgirl12@gmail.com.

or text request to 615.796.1915

or PM via facebook

You will then receive an email with an online payable invoice (please include a working email address that you will see today). It must be paid today for the special pricing to apply. If paying after midnight 6/2/14, regular prices will be charged.


Leave a comment »

playwithlifeorg

4 out of 5 dentists recommend this WordPress.com site

ultimatemindsettoday

A great WordPress.com site

#funnyemails

Started as a compilation of humorous, funny and weird emails that landed in my inbox; these days they are mostly whatsapp forwards.

Nails To Go

Taking holistic approach to your skin, nails and your home

THE MOURNING AFTER NATASHA

I’m the mother of two gorgeous girls. When my elder daughter, Natasha, was 7, she was diagnosed with a brain tumor. She passed away nearly five years later.

that MADDENing teacher

old teachers CAN learn new things

adamsandcompany

Just another WordPress.com site

Premier Home Inspection, LLC

"Be Advised, Not Surprised!" 615-481-7293

Downtown Murfreesboro

living in the heart of Tennessee

FierceFoods

Fighting cancer, allergies, and other bad guys...or, just understanding what we eat.

prestonbeautyblog

Your straight-up beauty authority

flyinldy

This WordPress.com site is the bee's knees

simplydevotions

The blog of Devotions from Everyday Things

BusyBrideShoppingGuide

Just another WordPress.com weblog

DANIEL HAYES TEAM'S WEBLOG

TOP MURFREESBORO REALTOR

Holistic Thoughtful Inquire

My thoughts and writings on Inner Awareness, Leadership Development, Thinking, and Spiritual Awaking